

An easy activity to create your own gel window decals! You can make these decals any shape, size, and colour you like. The gels are safe to play with, touch, and even eat! Once you're done, stick them up to help the birds near your home see the windows rather than flying into them. Check out our Hazardous Habitats Urban brochure for more info about making your yard safe for wildlife.

What You'll Need
2 boxes of gelatin (about 8 packages)
4 cups of water
Flat pan with edges
Cookie cutters
A large bowl or measuring jug
Spoon
Food colouring
Wood BBQ skewers or toothpicks
What to Do

Pour all 8 packages of gelatin into a large bowl or measuring jug. Add 4 cups of boiling water to the gelatin. Stir until all of the clumps of gelatin have dissolved and there are very few bubbles remaining. Make sure an adult handles the boiling water because it is very hot and you don't want to burn your hands or spill the water.
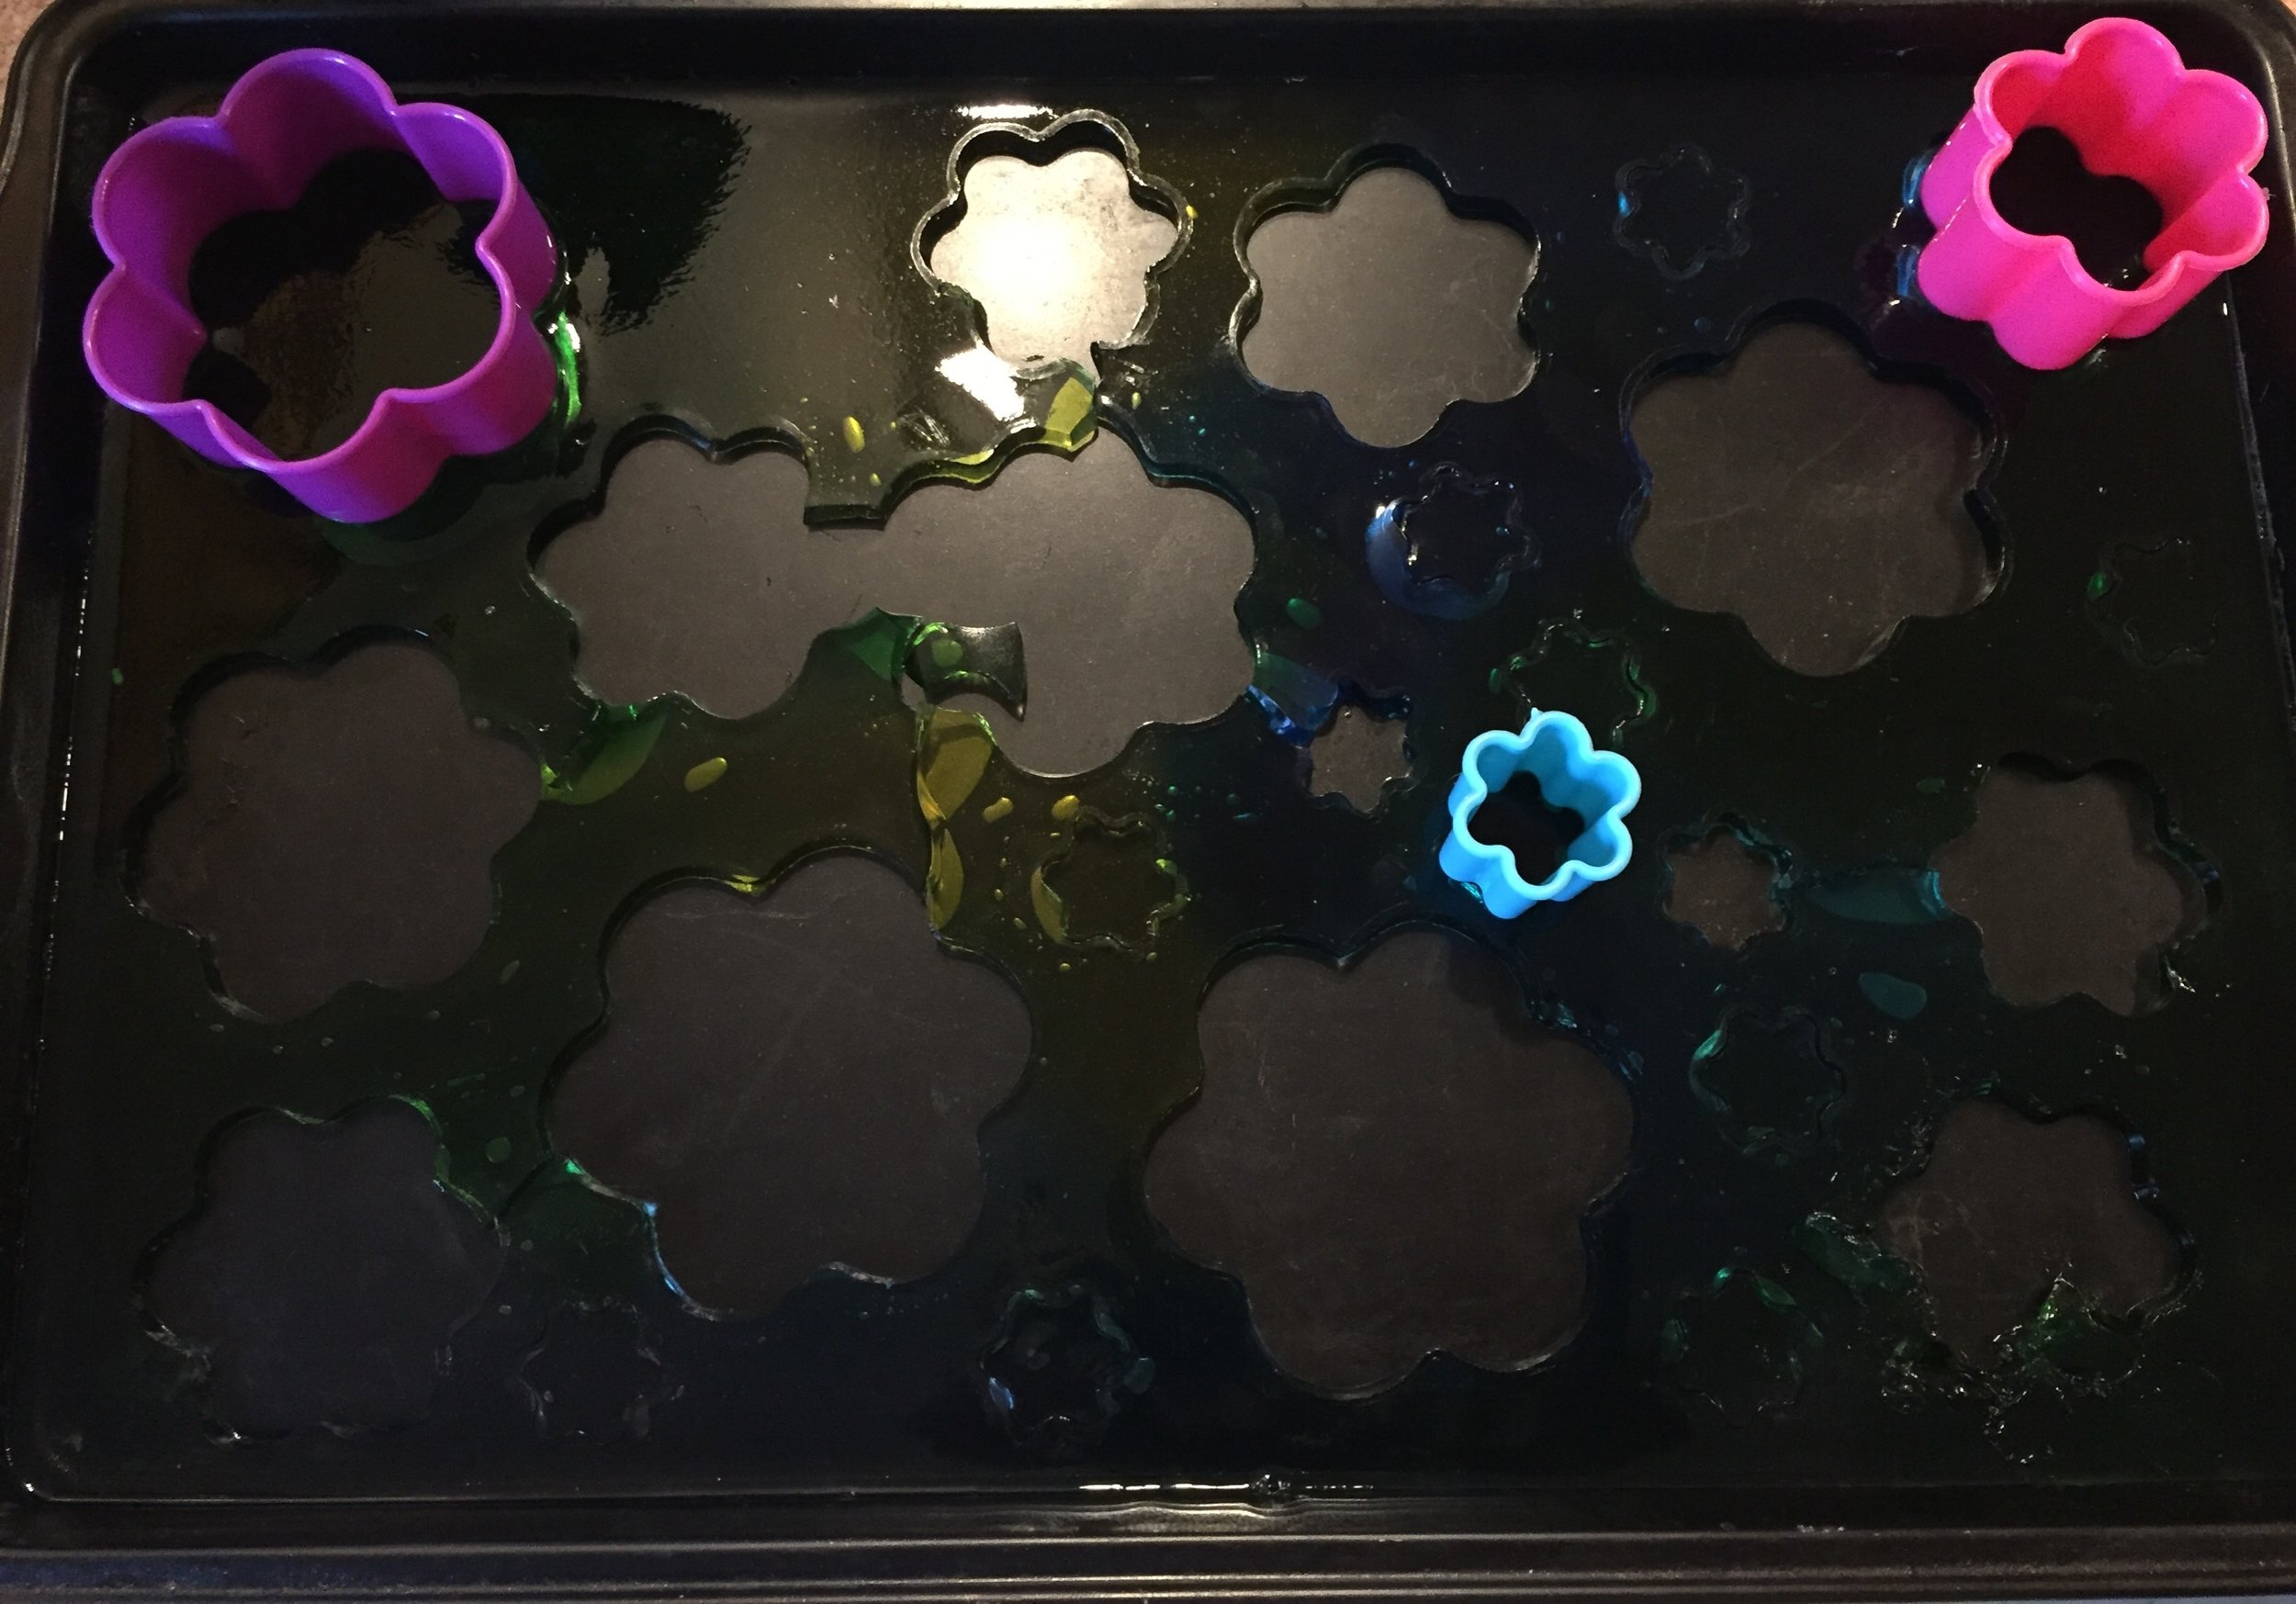
Pour the gel mixture onto a flat cookie sheet (with edges so it doesn't just spill off). The mixture will still be hot, so leave it to cool for about 20 minutes before proceeding to the next step.
Once it has cooled a little, squeeze some drops of food colouring onto the gel mixture. Use a toothpick or BBQ skewer to swirl the colours around.
Leave the mixture on the pan to harden. Your gel window decals will turn out best if you leave the mixture uncovered at room temperature overnight.
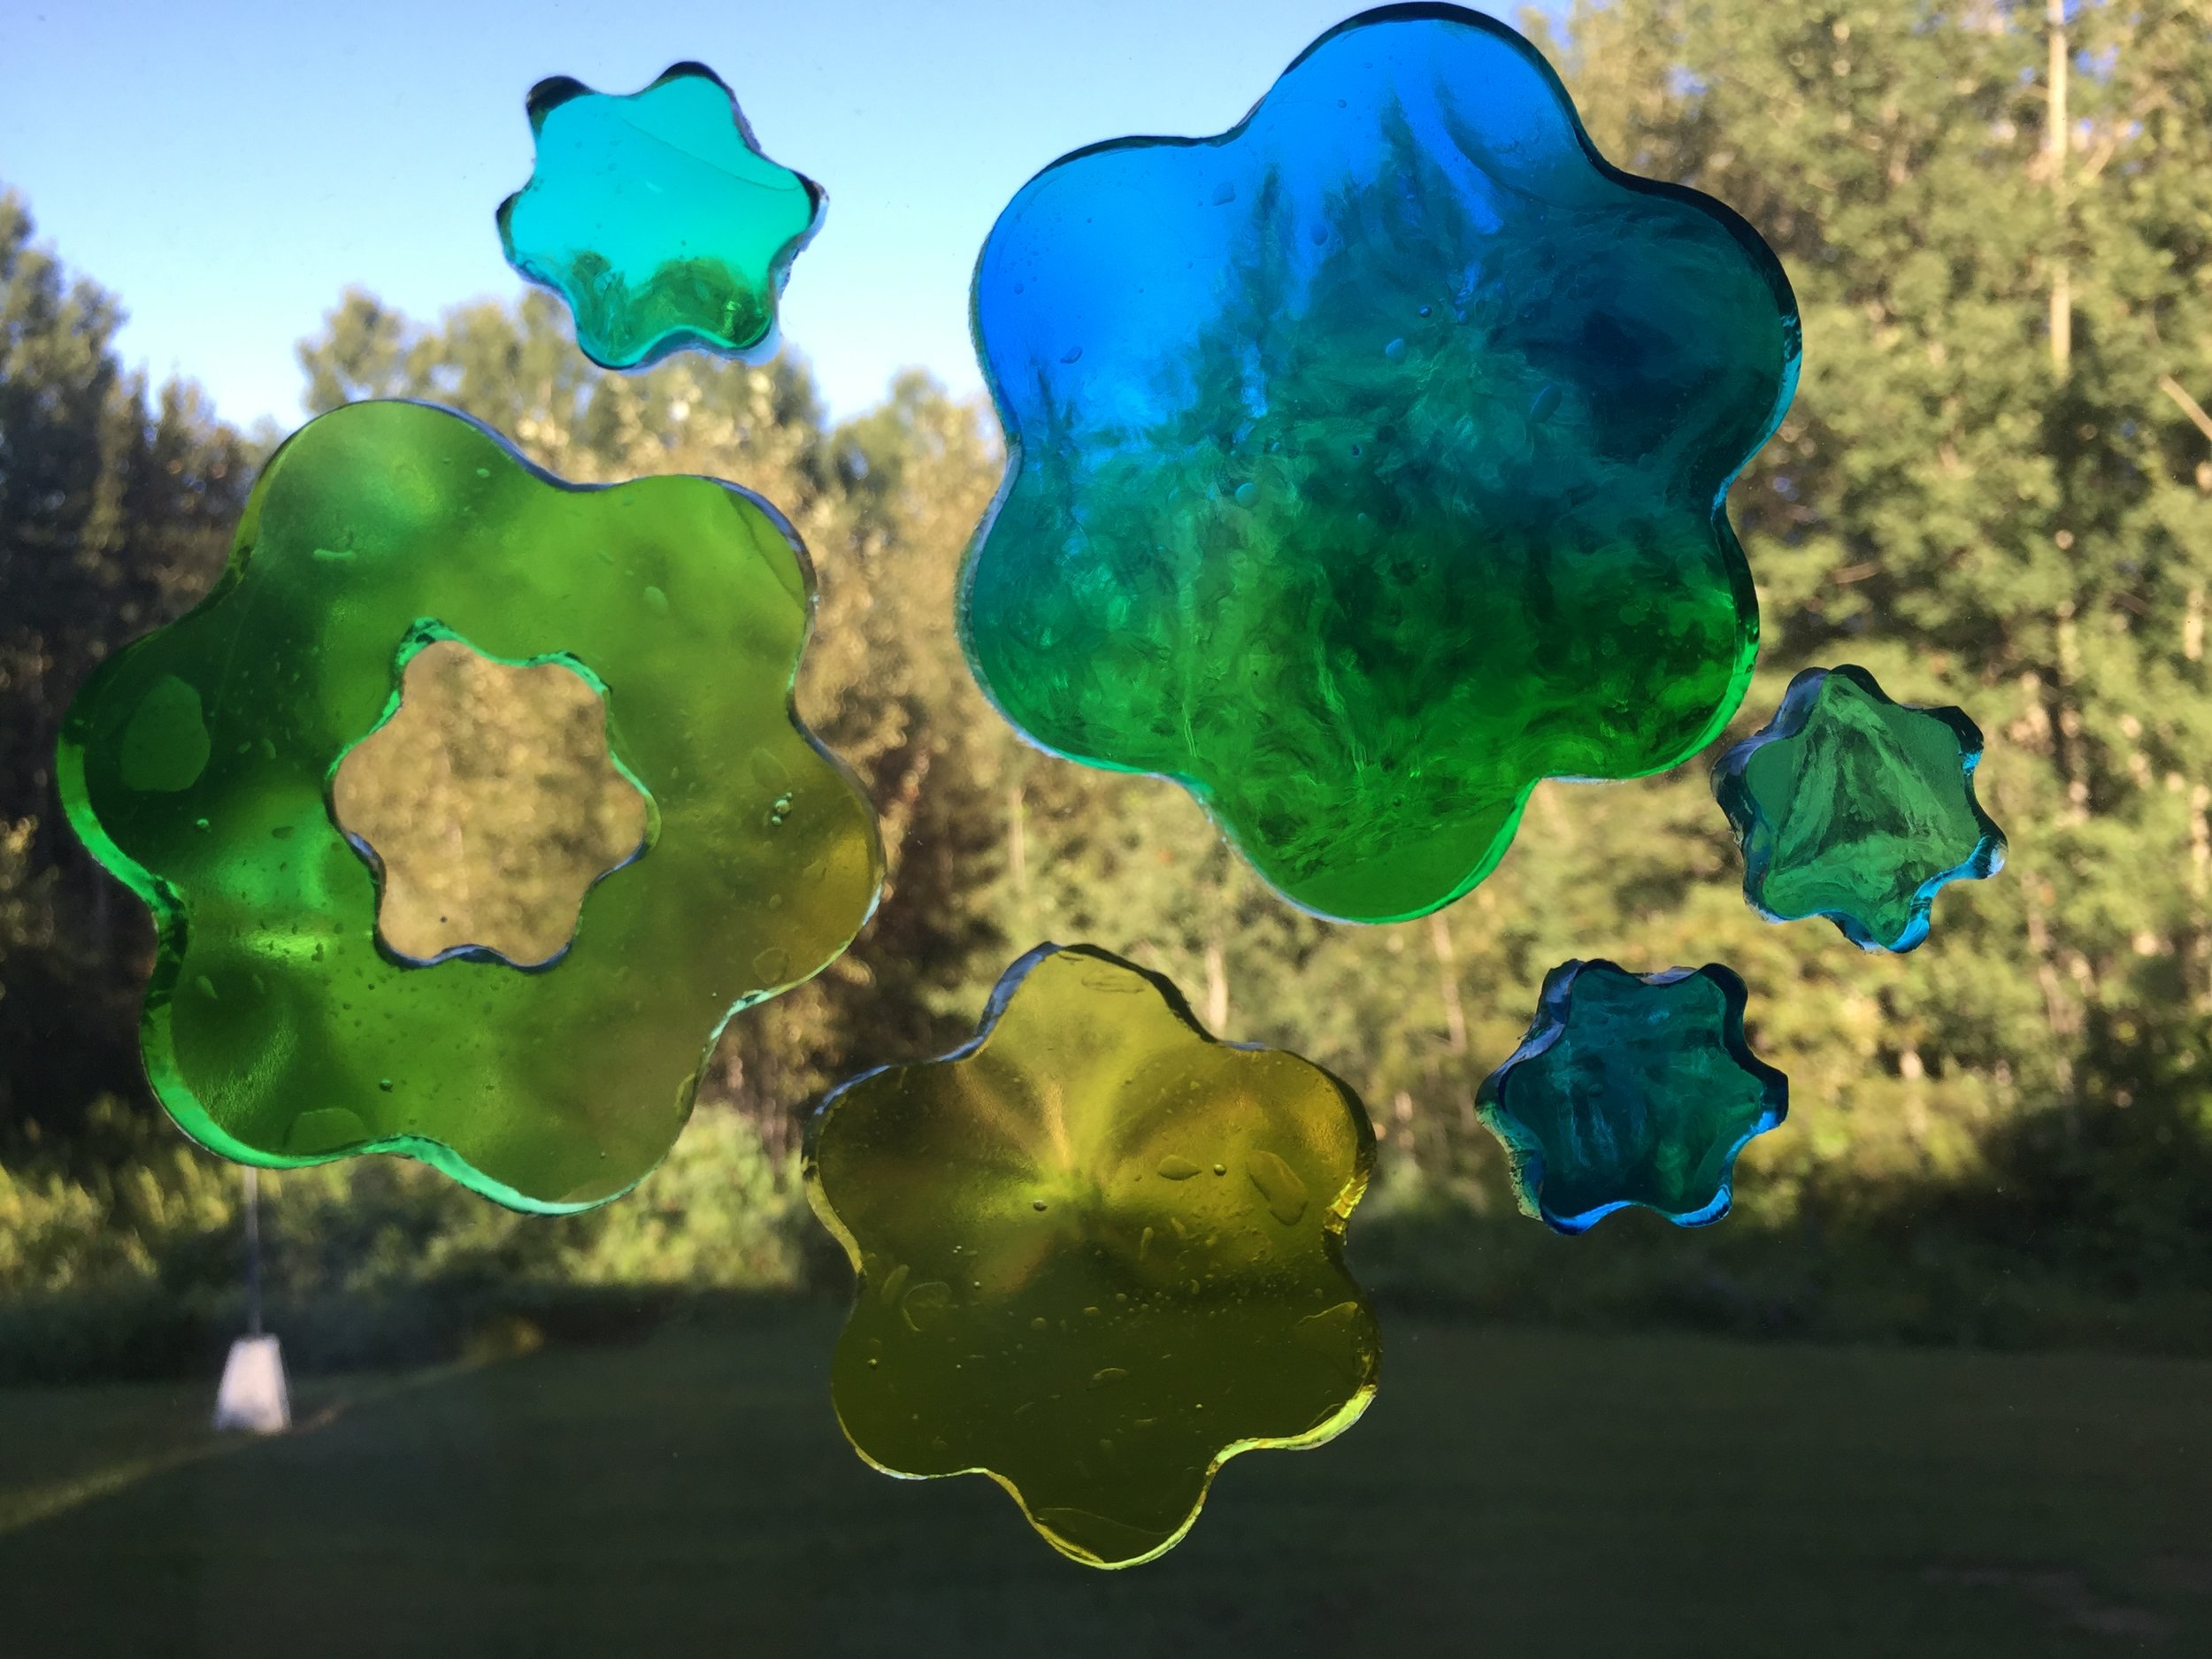
Once the gel has hardened, use cookie cutters to cut out the shapes of decals you would like.
Stick them to your windows! They make a beautiful decoration and increase visibility of your windows for birds.
Ask Yourself
When you mixed two colours together in the gel mixture, what happened?
Viscosity refers to how thick or thin a liquid is. Is water more viscous or less viscous than the liquid gel mixture?
How will sticking these gel decals to your windows help the birds flying near your home?